Showing posts with label Prosedur Penjagaan Rapi. Show all posts

Friday, 23 January 2015

Mesin, Peralatan & Kelengkapan

Terdapat beberapa mesin/ peralatan/ kelengkapan yang digunakan dalam penjagaan rapi Muhammad Solehuddin iaitu Ventilator, Oxygen Concentrator, Pulse Oxymeter, Suction Machine, Portable Oxygen Cylinder, Milk Perfusor Machine & Stethoscope seperti gambar di bawah :


* Alhamdulillah, Milk Perfusor Machine ini tidak perlu digunakan lagi oleh Muhammad Solehuddin sejak beberapa bulan lalu & telah didermakan kepada pihak Hospital agar dapat digunakan oleh pesakit lain
* kegunaan mesin ini adalah salah satu kaedah untuk memberi makan/ minum (susu+bijirin) kepada Muhammad Solehuddin
* sekarang ini, kaedah makan/ minum (susu+bijirin) Muhammad Solehuddin adalah bolus (rujuk nota prosedur 'feeding')


Item Prosedur (Disposeable & Cecair)

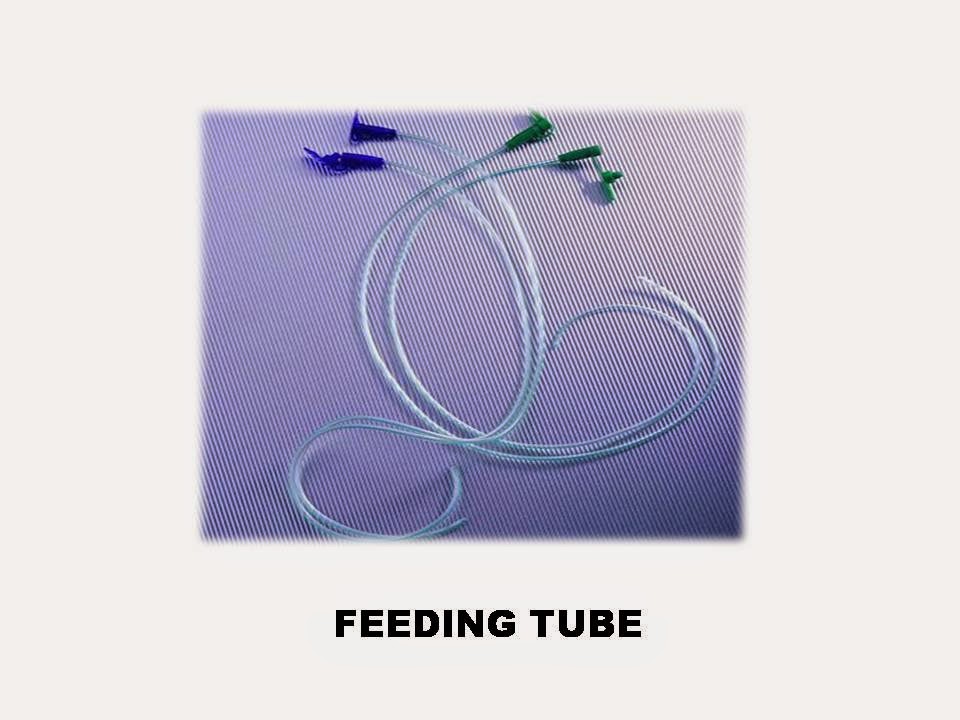
Terdapat beberapa Item Prosedur (Disposeable & Cecair) yang digunakan dalam penjagaan rapi Muhammad Solehuddin iaitu Nonin Cloth Disposeable Infant Sensor, Syringe, Suction Catheter, Feeding Tube, Twill Tape Tracheostomy Tube Tie, Hypafix Tape, Silicone Safetac, Gloves, Cotton Ball, Gauze, Lubricating Jelly & Normal Saline 0.9 Sodium Chloride seperti gambar di bawah :


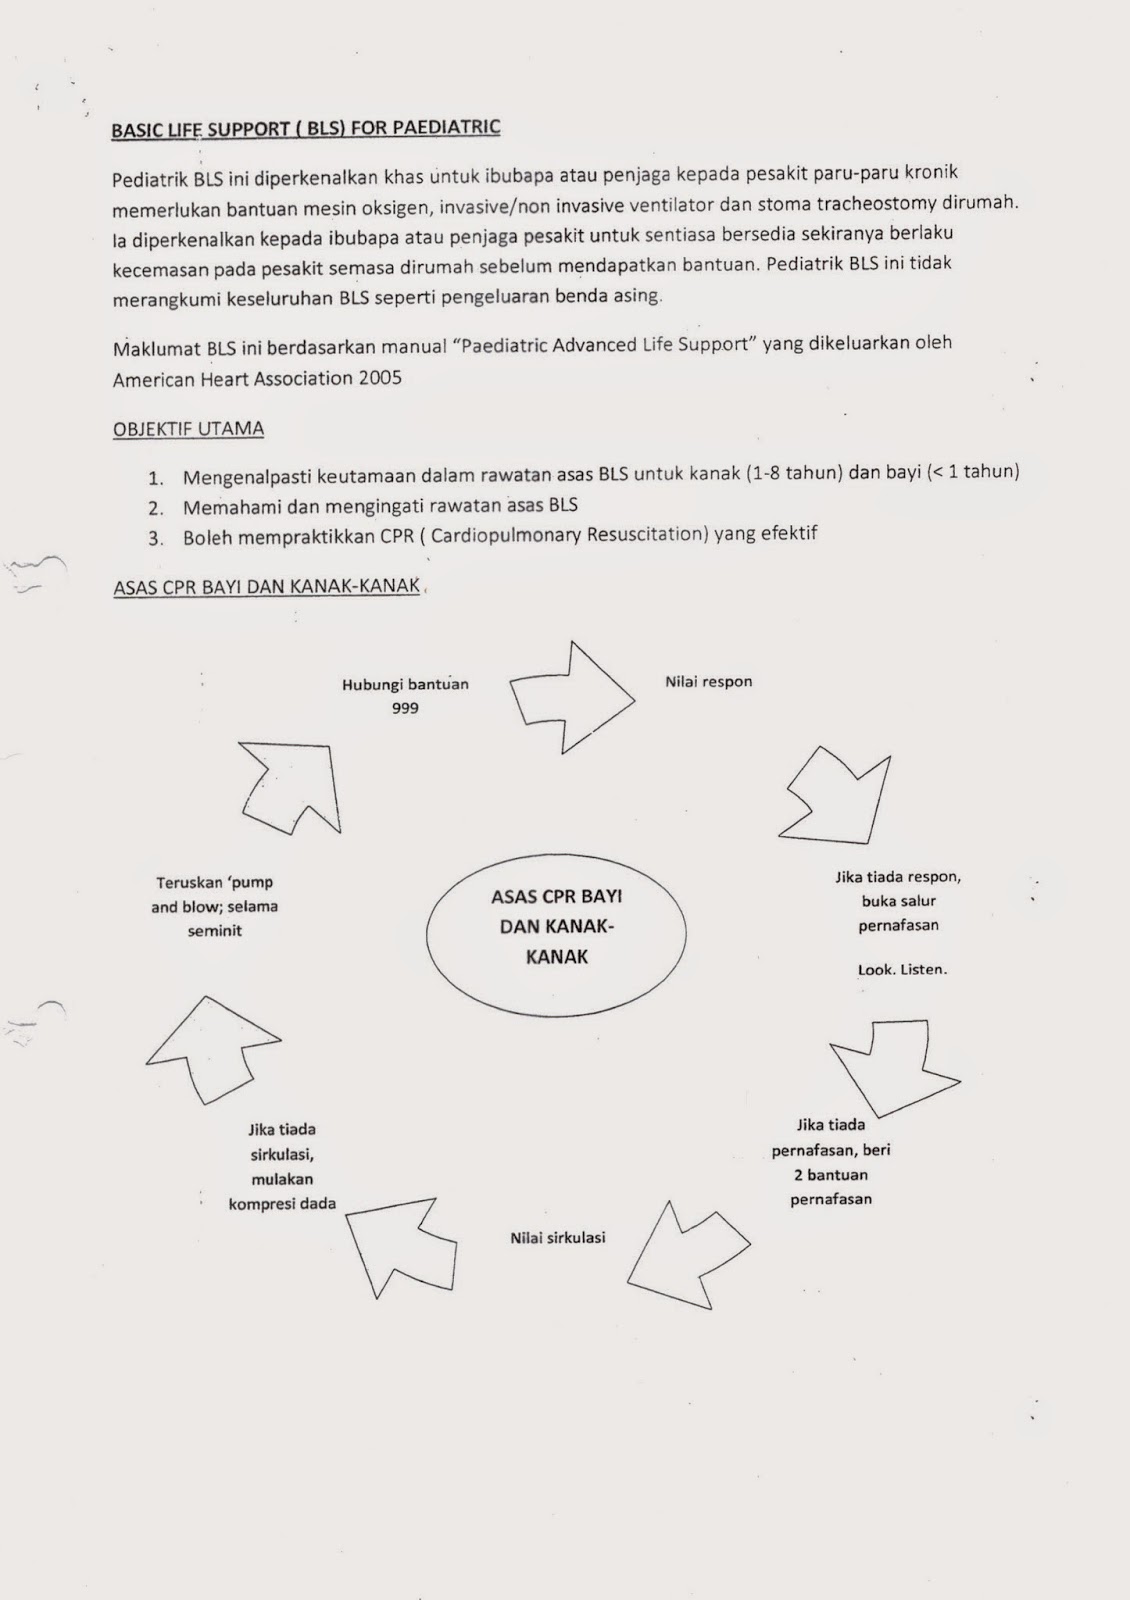
Basic Life Support (BLS) For Paediatric

'Basic Life Support (BLS) For Paediatric' secara ringkasnya adalah prosedur bantuan kecemasan yang akan diberikan kepada bayi & kanak-kanak. Kami telah mengikuti secara teori & praktikal prosedur ini, sebelum dibenarkan membawa pulang Muhammad Solehudin ke rumah. Prosedur ini sebenarnya sangat sukar bagi yang tidak biasa melakukannya, termasuklah kami. Namun, kami sentiasa berdoa semoga Alllah swt mempermudahkan urusan penjagaan Muhammad Solehuddin di rumah. Semoga Muhammad Solehuddin tidak berada dalam situasi sehingga prosedur bantuan kecemasan ini perlu dilakukan. Ini juga antara faktor utama, kami sekeluarga memutuskan Abah yang menjaga Muhammad Solehuddin sepanjang masa di rumah. Berikutan Mama telah melahirkan anak secara Caesarian sebanyak 2 kali berturut-turut dan masih baru pula, Mama mempunyai sedikit kesulitan untuk melakukannya. Ketika sesi latihan diadakan, Mama memang merasa sakit di bahagian rahim.

Mama tak dapat cari artikel yang lengkap di 'google'. Jadi, Mama sertakan nota yang diberikan oleh pihak Hospital kepada Mama & Abah. 


Rectal Wash-Out

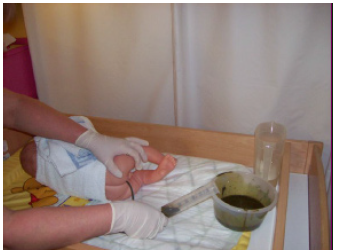
‘Rectal Wash-Out’ secara ringkasnya adalah cara kami mengeluarkan najis daripada badan Muhammad Solehuddin..kerana masalah usus yang dihadapinya, Muhammad Solehuddin adakalanya sukar untuk membuang air besar..sehubungan itu, prosedur ini perlu dilakukan sekiranya Muhammad Solehuddin tidak membuang air besar sepanjang hari..

Bagi pengendalian prosedur ‘rectal wash-out’..terdapat beberapa prosedur yang perlu dilaksanakan..artikel lanjut penerangan prosedur ini adalah seperti dibawah..

Clinical Guidelines (Nursing) : Neonatal Bowel Washout (Rectal) 


Neonatal Bowel Washout (Rectal) 


1. Introduction 

Rectal Bowel washouts are performed to decompress the bowel and deflate the abdomen by removing gas and stool using small amounts of Normal Saline 0.9%. 

They are: 

Performed in babies with Hirschsprung's Disease (HD) or to relieve low intestinal obstruction due to meconium plug, meconium ileus. or intestinal dysmotility of prematurity. 

Used as a mode of temporary management in proven cases of HD till definitive surgery. (This may be for 4-12 weeks depending on each case) 


2. Parameters 

This Guideline is to assist clinicians performing Rectal Bowel Washouts for neonatal patients within the neonatal unit at the RCH. It does not include older patients outside of the neonatal unit requiring bowel washouts 

Procedure must be ordered by the Surgical Team following patient review. 


3. Definition of terms 

Hirschsprung's Disease: A rare disorder of the bowel, most commonly of the large bowel (sometimes 
called megacolon), where there is a lack of nerves, known as ganglion cells in the bowel wall. This prevents effective peristalsis and results in intestinal obstruction 

It affects four times as many boys as girls with an increased incidence in infants with Down Syndrome 1 

Meconium Plug: This condition is the most common and mildest form of mechanical distal obstruction of the newborn. Inspissated and immobile meconium causes a transient form of distal colonic or rectal obstruction. The aetiology of this disorder is unclear. It is most common in preterm infants. 

Meconium Ileus: The obstruction is mainly caused by thick tenacious meconium. The sticky meconium is unable to be propelled through the intestine, usually the gut is not damaged and continuity is not disrupted 1. Meconium ileus occurs in 15% of infants with Cystic Fibrosis.1 In others, the condition is associated with volvulus, atresia or perforation.1 

4. Assessment 

Physical

Assess and record any signs of bowel obstruction these include 

Vomiting 

Note - frequency, colour and amount 

Is it bile stained? 

Note: Green bile staining indicates bowel obstruction, if present notify Surgical Team 

immediately 

Abdominal distension 

Is abdomen tight or shiny 

Determine and record degree of distension of the abdomen prior to performing bowel washout 

Bowel action

Time since last bowel action 

Note - frequency, consistency, colour, +/- blood 

Note: Measurement of abdominal girth is no longer used as an accurate method of determining 

abdominal distension 

Investigations 

Abdominal X ray 

Rectal biopsy 

Barium Studies 

Medical orders

Medical orders for bowel washout must be written clearly on the treatment order sheet MR55B by the treating surgeons/senior medical staff. Orders should include: 

Frequency 

Size of tube 

Length to be inserted. 

Amount (mls) Saline solution .9% to be instilled - Maximum per procedure 20mls/kg 

Note: Use only saline solution 0.9% - the use of other solutions or concentrations in this patient group may be dangerous 

Procedure

Perform bowel washout as prescribed. The frequency of washouts is determined according to the 

effectiveness of decompression of the bowel 

Notify surgeons if two successive washouts fail to achieve abdominal decompression 

Documentation

Observe, and document 

Amount of decompression 

Note reduction in abdominal distension - Is the abdomen soft, palpable? 

Washout result 

Volume colour consistency amount and type eg. stool/meconium 

Equipment Special Consideration

Catheters 

The catheters used should be soft. Do not use Naso Gastric Tubes with a weighted tip. 

Nelaton catheters are softer and less likely to damage mucosa 

Orders should include specific size, and length of catheter to be inserted 

Weight Size Length to be inserted 

Weight < 2kg Size 8FG Nelaton 2-3cm 

Weight > 2kg Size 10FG Nelaton 5cm 

Confirm orders with treating surgeon/doctor if they vary from the above guide 

Syringe 

Terumo 60mls catheter tip syringe 

Normal Saline Sachets 0.9% 

Ensure normal saline sachets are warmed prior to use (warm to touch). Infants, especially 

premature infants can cool quite rapidly if solution is cold. Volume of saline to be used is 

determined by the surgeons and should be written as an order 

Lubricant

Use only water based lubricant 

Incosheets 

Use inco-sheets to protect soiling of bed 


Process Consideration 

Position infant, usually on his/her back with legs inmthe frog position 

Select appropriate sized catheter for use 

Warm normal saline solution and prime catheter 

Lubricate tip of catheter and gently insert into the rectum. 

Length determined by surgical instructions 

Instil saline in 10 - 20 ml aliquots (by pushing in with syringe plunger) over 1-2 minutes(there should be no resistance when injecting the normal saline). 

Remove syringe and let fluid run into nappy/kidney dish 

Procedure may be repeated twice if return is not clear 

If there is saline retention or return is not clear contact surgeon 

Remove catheter from the rectum 

Note and record results of bowel washout accurately on fluid balance chart (MR55B) 

Special

Use inco-sheets to protect soiling of bed 

Do not use excessive force if resistance is felt. 

Contact medical staff if unsure 

Do not pull back on syringe to aspirate, allow the saline to run out naturally 

Do exceed maximum of 20ml/kg 


5. Complications 

Reabsorption of saline 

In premature infants, there is a risk of reabsorption of saline, especially if most of the solution is not 

expelled. In the case of retention 

- contact the surgical team 

-  consider U+Es 

- record volume of saline retained
this article finished here


Artikel ini tiada gambarajah..Jadi, kami cuba 'google' artikel lain yang ada gambarajah, untuk memudahkan pemahaman dalam prosedur ini..

Neonatal Rectal Wash-Out  Figures

Credit to St George’s Healthcare NHS Trust


Change & Cleaning Tracheostomy

‘Change & Cleaning Tracheostomy’ secara ringkasnya adalah cara kami membersihkan kawasan ‘tracheostomy’ dan menukar ‘tracheostomy tube’ Muhammad Solehuddin..bagi prosedur ‘dressing’ @ ‘cleaning’, perlu dilakukan secara rutin..manakala prosedur ‘changing’ ini, sebenarnya dilakukan oleh Pakar Bedah semasa Muhammad Solehuddin dirawat di Hospital..tetapi, kami kena lakukan sendiri di rumah..prosedur ini, antara yang paling susah untuk dilakukan dan memerlukan bantuan orang lain..mujurlah ianya tidak perlu dilakukan setiap hari..prosedur ini, hanya perlu dilakukan jika ‘tracheostomy tube’ tercabut atau tersumbat dan telah tiba ‘due date’ untuk penukaran tiub..

Bagi pengendalian prosedur ‘change & cleaning tracheostomy’..terdapat beberapa prosedur yang perlu dilaksanakan..artikel lanjut penerangan prosedur ini adalah seperti dibawah..

How to Change and Clean Your Child's Tracheostomy - University of Minnesota Masonic Children's Hospital


How to Change and Clean Your Child's Tracheostomy

A tracheostomy requires regular care to keep the area clean and to prevent infection and skin breakdown. Clean and check skin at least 1 time(s) a day. Some doctors will advise cleanings twice daily or more. Change the trach tube every 10 days or as often as you have been told by your health care provider. If possible, have two adults present when changing the trach tube. Follow the general guidelines below and any other specific instructions you are given.

Collect Supplies

Some people find it helpful to set up and do changing and cleaning in the same place each time. Choose a clean, well-lighted space near a sink. Supplies you will need for cleaning and changing include:

Rolled-up towel or pillow

Liquid soap, alcohol, or disinfectant foam

Clean, disposable, powderless gloves

Gauze

Normal saline solution

Trach ties and scissors, cut to the right length

Trach tube

Two sterile or disposable cups

Small towel

Suction machine


Clean and Check the Skin

Ask your health care provider whether or not a tracheostomy dressing is needed. If so, change this gauze when cleaning the trach site. 

Do not use gauze containing cotton because your child may inhale the tiny fibers. Only use pre-cut gauze. Cutting gauze on your own will result in frayed edges that increase risk for infection.

Have your child lie on his or her back in a comfortable position. Put a rolled-up towel under the shoulders.

Wash your hands and put on disposable gloves.

Clean the neck plate and the skin under it. Use clean gauze pads or other non-fraying material dabbed in normal saline solution.

A thorough cleaning technique you may consider involves cleaning the stoma in a step-wise fashion, one quarter at a time. Start at the 12 o'clock position wiping to the 3 o'clock position, then with a new gauze pad for each section, clean from 12 o'clock to 9 o'clock followed by the 3 o'clock to 6 o'clock position and lastly from the 9 o'clock to 6 o'clock position.

Pat the area dry with clean gauze.

Check the skin for signs of infection, such as redness, swelling, or warmth.

Wash your hands when you finish.


Replace the Trach Tube

Ask the doctor about whether or not to use an obturator, which may make it easier to insert the tube. Its rounded edges also protect the stoma during insertion. If you need to use a lubricant, be sure to ask the doctor how much to use. Have a suction machine ready, if needed. Depending on the age of your child, explain the procedure as well as you can. If two people are available, one person removes the old trach tube and the other secures the new one.


Have your child lie on his or her back in a comfortable position. Put a rolled–up towel under the shoulders.


Wash your hands with liquid soap and warm water. Dry well. You may also use alcohol or disinfectant foam.

Put on disposable gloves.

Get the new trach ties ready by draping them around your child’s neck.

Open the trach tube package and insert the obturator (if you’re using one) into the new trach tube.

Remove the entire old trach tube and lay it down on the towel. Remove gauze if you have used it.

Immediately replace the old trach tube with the new one. While holding the edges of the tube, remove the obturator right away, if you’re using one. Your child cannot breathe if it is left in place.

Secure the trach ties.

Take Precautions with Skin Care

Unless the area is infected, it is now recommended to avoid the use of hydrogen peroxide mixture directly on the skin. This is because it causes inflammation and increases infection risk. It can also cause mucosal irritation and increase tracheal secretions. Be sure to ask your child's doctor when and if the use of a hydrogen peroxide mixture is appropriate for your child before using it. If a hydrogen peroxide mixture is used on an infected site, it is important to rinse the area with normal saline solution afterward.

Be sure to not get soap or water into the stoma or trach tube. Watch for signs of infection: swelling, heat, redness, smelly discharge, fever, or pain when suctioning. If you suspect that the tracheostomy is infected, call your child’s doctor right away.

Call the doctor right away if your child has any of the following:

Red, painful, or bleeding stoma

Yellow or green, smelly, bloody, or thick mucus from the stoma

Fever :

In an infant under 3 months old, a rectal temperature of 100.4°F (38.0°C) or higher

In a child 3 to 36 months, a rectal temperature of 102°F (39.0°C) or higher

In a child of any age who has a temperature of 103°F (39.4°C) or higher

A fever that lasts more than 24-hours in a child under 2 years old, or for 3 days in a child 2 years or older

Your child has had a seizure caused by the fever

Swelling around the trach tube

Pain when you suction the trach tube

Shortness of breath or any trouble breathing

Vomiting

Trach tube or suction catheter that is difficult to insert

Suctioning

‘Suctioning’ secara ringkasnya adalah cara kami mengeluarkan kahak daripada ‘tracheostomy tube’ Muhammad Solehuddin..prosedur ini perlu dilakukan setiap kali sebelum memberi makanan kepada Muhammad Solehuddin..prosedur ini sangat penting, bagi mengelakkan salur pernafasan melalui ‘tracheostomy’ tersumbat..yang boleh mengakibatkan perkara tidak diingini berlaku..

Bagi pengendalian prosedur ‘suctioning’..terdapat beberapa prosedur yang perlu dilaksanakan..artikel lanjut penerangan prosedur ini adalah seperti dibawah..

When Your Child Needs a Tracheostomy: Suctioning –

University of Minnesota Masonic Children's Hospital

http://www.uofmchildrenshospital.org/healthlibrary/Article/88999


When Your Child Needs a Tracheostomy: Suctioning
In a trach tube, mucus can build up and thicken. As a result, mucus can plug up the trach tube, making it hard for your child to breathe. Regular suctioning of mucus keeps the tube clear. You will be instructed on how to suction mucus to keep the tube clear. You will also be instructed about techniques for cleaning catheters and how deeply to insert them while suctioning. Below are the basic steps. Follow any other instructions you are given.


When to Suction

Usually, suctioning is done just before changing and cleaning the trach tube. But you may need to suction more often, depending on your child’s age and the reason for the trach tube. An older child may be able to tell you if he or she feels that suctioning is needed. Here are signs that you may need to suction: Your child is breathing more quickly. You hear a whistling or rattling sound when your child breathes. There are bubbles of mucus at the trach opening or you hear gurgling or rattling sounds as though mucus is present. Your child is having trouble breathing or eating.


Gathering Your Supplies

As with cleaning, you may find it easier to set up in the same area each time you do suctioning. Choose a clean, well-lighted space near a sink. It is a good idea to have access to a resuscitation bag, in case of an emergency with the trach.


Suctioning supplies include:

Liquid soap, alcohol, or disinfectant foam

Clean, disposable, powderless gloves

Suction machine, tubing, and catheters (you may also use an additional premarked catheter to help guide insertion depth)

Sterile water

Sterile saline solution

Syringe or eyedropper

Sterile or clean cup

Tissues


Setting Up Your Equipment

First explain to your child what you are about to do. Then set up what you will need:

Wash your hands with liquid soap and water.

Dry well. You may also use alcohol or disinfectant foam.

Put on gloves.

Attach the catheter to the suction machine.

Don’t touch the end that will go into the trach tube.

Turn on the suction machine to 50 –100 mm Hg.

Pour sterile water into a cup.

Test whether the catheter is working. Dip the tip of the catheter into the sterile water.
Suctioning the Trach Tube

Below are basic instructions for suctioning. You may have been given additional specific instructions. Do the following only if your healthcare provider tells you to:

Use a syringe or eyedropper to put a small amount (about 1 mL) of sterile saline solution into the trach tube. This helps loosen mucus.

Have your child take a few deep breaths.

Insert a catheter gently into the trach tube as far as you’ve been instructed to do. (Insertion depth depends on the size of your child and the length of the trach tube.)

Apply suction by covering and uncovering the suction valve on the catheter.

While twirling the catheter, withdraw it to remove mucus. Do not keep the catheter in place for more than 5–10 seconds at a time.

Draw saline into the catheter to clear it of mucus.

Let your child rest and breathe for 1 –2 minutes.

Then repeat suctioning until the trach tube is clear and makes no more rattling sounds.

Check the secretions. Notify the doctor if there are any changes in odor, thickness, color, or amount.

Do other steps as instructed. For example, you may also suction your child’s nose and mouth. Or you may need to give extra oxygen (do this only if instructed).


Cleaning Up
Turn off the machine.

Throw away the saline and gloves.

Ask whether you can reuse the catheters and, if so, how often.

If reusing the catheter, flush it with distilled water, wipe the outside with alcohol and air dry.

Keep the catheter tip sterile by covering it with a cap.

Store the catheter in its original package in a clean, dry place. Or, throw the catheter away.

Follow equipment supplier directions for how to clean the suctioning machine and how often.

Making Suctioning Easier for Your Child

Suctioning can produce a gagging sensation, which can be scary to your child. Tell your child that this is normal. It may also help to do relaxing activities beforehand. Let your child rest in between suctioning. And don’t suction for any longer than your child can hold his or her breath. The whole session should last no more than 5–10 minutes.


Call the doctor right away if your child has any of the following:

Red, painful, or bleeding stoma

Yellow or green, smelly, bloody, or thick mucus from the stoma

Fever of 100.4°F or higher

Swelling around the trach tube

Pain when you suction the trach tube

Shortness of breath or any trouble breathing

Vomiting

Trach tube or suction catheter that is difficult to insert

Feeding Tube Changing

‘Feeding Tube Changing’ secara ringkasnya adalah cara kami menukar tiub yang digunakan untuk memberi makanan (susu + bijirin) kepada Muhammad Solehuddin..

Bagi pengendalian prosedur ‘feeding tube changing’..terdapat beberapa prosedur yang perlu dilaksanakan..artikel lanjut penerangan prosedur ini adalah seperti dibawah..


Your Child’s Nasogastric Tube: A Comprehensive Guide to Care–

University of Minnesota Masonic Children's Hospital


Your Child’s Nasogastric Tube: A Comprehensive Guide to Care


Your child is going home with a nasogastric (NG) feeding tube in place. This is a soft, thin tube inserted through your child’s nose down into his or her stomach. It delivers liquid food directly to the stomach. You were given home care instructions for your child’s tube before he or she was discharged from the hospital. These sheets can help you remember those instructions when you and your child are at home. Arrangements may also be made for a home health nurse to help you.


NOTE: There are many types of NG tubes, feeding syringes, and pumps. Your child’s NG tube and supplies may look or work differently from what are described and shown here. Always follow the instructions given by your child’s health care provider or home health nurse. Ask them for phone numbers to call if you need help. Also, make sure you have the phone number for your child’s medical supply company. You may need to order more supplies for your child in the future. Write all of these phone numbers below.


Health care provider phone number: ___________________

Home health nurse phone number: ___________________

Medical supply company phone number: ___________________


Home Care: Placing the Tube


Your child’s NG tube needs to be replaced every 14 days. (If your child pulls the tube out before then, you’ll need to reinsert it. It’s okay to use the same tube in this case. Before you reinsert it, wash the tube with soap and water.)

Change nostrils each time you need to insert the tube.


Supplies

NG tube

Dark-colored marker pen

Water-based lubricant

Adhesive skin dressing

Tape

5-to-10 cc/mL syringe


Steps

Prepare the tube.

Wash your hands with soap and water.

One end of the tube is rounded and goes into the nose. The other end has two ports. One port is for
feeding. The other port is for giving medications.

The tube may have a wire (metal stylet) inside it. The wire keeps the tube from curling. If your child’s tube has a wire, check that it can be removed easily and doesn’t get stuck.

Measure the tube.

Hold the tip of the tube at your child’s nose.

Extend the tube to the earlobe. Then, extend from the earlobe to a spot between the bottom of the
breastbone (xyphoid process) and the belly button.

Keep your finger on the tube at this spot.

Use a dark marker pen to mark this spot on the tube. This shows how much of the tube needs to be

inserted before it reaches the stomach.


Position your child.

If your child is an infant, wrap him or her in a blanket to prevent movement.

If your child is older, he or she should sit upright. Also, if possible, have your child tuck his or her chin slightly toward the chest.

Insert the tube.

You may need someone to hold your child while you insert the tube.

Apply water-based lubricant to the tip of the tube so that it can slide through the nose easily.

Gently guide the tube into either nostril.

The tube is easier to advance when your child is swallowing. An infant can suck on a pacifier as you insert the tube. An older child can drink water or dry swallow. Don’t force the tube. If your child coughs, gags, or has trouble breathing, stop and wait. Allow your child to rest. Then, try again.

Advance the tube until the mark you made earlier reaches the child’s nose.

Place the adhesive skin dressing on your child’s cheek where you plan to tape the tube. This protects your child’s skin from being damaged by the tape.

Tape the tube to your child’s cheek over the adhesive skin dressing (as you were shown in the hospital).

This secures the tube in place.

If your child’s tube has a wire, remove it at this time. Don’t throw the wire away. In case you need to
reinsert the tube, the wire can be reused to keep the tube straight.

Check the placement of the tube.

Attach the syringe to the end of the tube and make sure the other port of the tube is closed off.

Pull back on the plunger of the syringe to get stomach contents.

Check the pH using pH paper. Gastric (or stomach) pH should be 1 to 4 if your child is not on a proton pump inhibitor or H2 receptor antagonist. Please discuss your child's medication with his or her doctor.

Observe the color of the fluid. Gastric (stomach) fluid should look clear, light yellow, or light green.

Disconnect the syringe from the tube.

When the placement of the tube is confirmed, adjust the tape on your child’s cheek to secure the tube in place, if needed.

Wash the syringe with soap and water and let it dry.

Wash your hands with soap and water when you are done.


Tips for Parents


Some parents don’t like how the tube looks on the child. But it shouldn’t be uncomfortable for your child. The tube doesn’t hurt and your child will get used to it in time.

When placing the tube, it may help to talk to your child and explain what you’re doing. Praise your child after you have placed the tube.

You’ll need to check the skin around your child’s nose and face regularly to prevent soreness and infection.

Keep the area around your child’s nose clean and dry. Also, make sure to cleanse your child’s mouth
regularly. Do this even though he or she isn’t taking food by mouth.

Always have a backup tube in case a problem occurs with your child’s tube.


Home Care: Checking Tube Placement Before Feeding


Every time you feed your child, check to make sure that the NG tube is in the right place. The end of the tube must be in your child’s stomach, NOT in a lung or the throat. Perform this check BEFORE each feeding.


Supplies

5-to-10 cc/mL syringe

Steps

Wash your hands with soap and water.

Check for proper tube placement:

Attach the syringe to the end of the tube and make sure the other port of the tube is closed off.

Pull back on the plunger of the syringe to get stomach contents.

Check the pH using pH paper. Gastric (or stomach) pH should be 1 to 4 if your child is not on a proton pump inhibitor or H2 receptor antagonist. Please discuss your child's medication with his or her doctor.

Observe the color of the fluid. Gastric (stomach) fluid should look clear, light yellow, or light green.

Disconnect the syringe from the tube.

When the placement of the tube is confirmed, adjust the tape on your child’s cheek to secure the tube in place, if needed.

Wash the syringe with soap and water and let it dry.

Proceed with feeding as you have been instructed.

Wash your hands with soap and water when you are done.

Note: If you are NOT SURE the tube is in the stomach, DON'T proceed with the feeding. Reinsert or advance the NG tube as you were instructed by the health care provider and REPEAT the steps the check for CORRECT placement.

Feeding

Feeding secara ringkasnya adalah cara kami memberi makanan kepada Muhammad Solehuddin..Muhammad Solehuddin tidak boleh makan atau minum seperti kanak-kanak normal yang lain..Muhammad Solehuddin hanya minum susu yang dicampur dengan bijirin melalui ‘feeding tube’..

Bagi pengendalian prosedur ‘feeding’..terdapat beberapa prosedur yang perlu dilaksanakan..artikel lanjut penerangan prosedur ini adalah seperti dibawah..

Your Child’s Nasogastric Tube: A Comprehensive Guide to Care–

University of Minnesota Masonic Children's Hospital

http://www.uofmchildrenshospital.org

Home Care: Feeding Your Child

There are two types of feeding that can be done with an NG tube:


Bolus feeding. A meal-sized amount of liquid food is given through the tube several times a day. Bolus feeding is given using a syringe or a pump.

Continuous feeding. Liquid food is dripped slowly through the tube. Continuous feeding is given using a pump.


Your child may be prescribed one or both types of feeding. Detailed instructions for each type of feeding are given below.

Bolus Feeding Using a Syringe


Your child’s health care provider or home health nurse will tell you how much liquid food to use for each bolus feeding. You’ll also be told how often to feed your child every day. Write these numbers below:

How much to give at each feeding: _________________________

How often to feed: __________________________


Supplies

NG tube

Liquid food

Feeding syringe

5-to-10 cc/mL syringe (for flushing)

Water (for flushing)


Steps

Wash your hands with soap and water.

Check the placement of the tube to confirm that it’s in the stomach (as you were shown in the hospital). Always do this BEFORE starting a feeding.

Check the label and expiration date of the liquid food. Don’t use any can (or bag) if the expiration date has passed. Instead, get a new can (or bag).

Open the feeding port cap at the end of the tube.

Pull the plunger out of the feeding syringe.

Connect the feeding syringe to the feeding port of the tube.

Gently bend or pinch the tube with one hand. Keep bending or pinching the tube as you slowly pour the food into the feeding syringe with your other hand. This keeps the food from flowing through the tube until you have finished measuring it.

Fill the feeding syringe only to the amount that was prescribed by your child’s health care provider.

Release the hand that is bending or pinching the tube.

Hold the feeding syringe straight up. This allows the food to run through the tube by gravity. Adjust the angle of the feeding syringe to control the flow rate of the food.

If the food flows too slowly or doesn’t flow at all, place the plunger in the syringe. Gently, push the plunger a bit. This can help remove anything that is blocking or clogging the tube. Do not push the plunger all the way into the syringe or with force.

Refill the feeding syringe with food, if needed. Repeat steps until your child has received the prescribed amount of food.

After the feeding, flush the tube with water (as you were shown in the hospital).

Disconnect the feeding syringe.

Close the feeding port cap of the tube.

Wash your hands with soap and water when you are done.


Additional

instructions: _________________________


Bolus Feeding or Continuous Feeding Using a Pump

For bolus feeding, your child’s health care provider or home health nurse will tell you how much liquid food to use for each feeding. You’ll also be told how often to feed your child every day. Write these numbers below:

How much to give at each feeding: _____________

How often to feed: __________________________

For continuous feeding, the amount of food to be given and time frame are often set on the pump for you. Do not change pump settings unless you’re instructed to do so.


Supplies


NG tube

Liquid food

Clean feeding bag with tubing

Feeding pump

5-to-10 cc/mL syringe (for flushing)

Water (for flushing)

Steps

Wash your hands with soap and water.

Make sure the pump is in the STOP/OFF mode.

Check the placement of the tube to confirm that it’s in the stomach (as you were shown in the hospital). Always do this BEFORE starting a feeding.

Check the label and expiration date of the liquid food. Don’t use any can (or bag) if the expiration date has passed. Instead, get a new can (or bag).

Make sure the clamp on the feeding bag tubing is closed.

Pour a little more than the prescribed amount of liquid food into the feeding bag. Close the top of the bag.

Hang the feeding bag on the pole above the pump. Make sure the feeding bag tubing hangs straight.

Open the clamp on the feeding bag tubing slowly. Let a small amount of food run through the end of the feeding bag tubing. This clears air out of the feeding bag tubing. It also helps keep your child from having gas later.

Load the feeding bag tubing into the pump.

Close the clamp on the feeding bag tubing.

Open the feeding port cap at the end of the NG tube.

Connect the feeding bag tubing to the feeding port of the NG tube.

Open the clamp on the feeding bag tubing.

Check that the settings on the pump are correct.

Turn the pump to START/ON.

After the feeding, flush the tube with water (as you were shown in the hospital).

Disconnect the syringe from the NG tube.

Close the feeding port cap of the NG tube.

Wash your hands with soap and water when you are done.

Additional

instructions: ____________________


Home Care: Flushing the Tube


One of the things you must do is flush your child’s tube regularly to keep it from getting clogged. Detailed instructions are given below.

Flushing the Tube for Bolus Feeding Using a Syringe


Flush your child’s NG tube after each feeding or as instructed by your child’s health care provider or home healthnurse.


Supplies

Feeding syringe

Water


Steps

Wash your hands with soap and water.

The feeding syringe should already be connected to the NG tube.

Pour water into the syringe. Let it run through the NG tube by gravity.

If the water flows too slowly or doesn’t flow at all, place the plunger in the syringe. Gently, push the plunger a bit. This can help remove anything that is blocking or clogging the NG tube. Do not push the plunger all the way into the syringe or with force. Changing the child’s position so that he or she is lying down or sitting upright may also improve the flow.

Disconnect the syringe from the NG tube when the flushing is complete.

Close the feeding port cap of the NG tube.

Wash your hands with soap and water when you are done.


Additional

instructions: _____________________


Flushing the Tube for Bolus Feeding or Continuous Feeding Using a Pump


Flush your child’s NG tube after each bolus feeding, or as instructed by your child’s health care provider or home health nurse. With continuous feeding, you may only need to flush the tube after the last daily feeding.


Supplies

5-to-10 cc/ml syringe

Water


Steps


Wash your hands with soap and water.

Make sure the pump is in the STOP/OFF mode.

Make sure the clamp on the feeding bag tubing is closed.

Disconnect the feeding bag tubing from the NG tube.

Put the tip of the empty syringe in water.

Draw up 5-to-10 cc/mL of water.

Connect the syringe to the feeding port of the NG tube.

Gently push the plunger all the way into the syringe.

Disconnect the syringe from the NG tube when the flushing is complete.

Close the feeding port cap of the NG tube.

Wash your hands with soap and water when you are done.


Additional

instructions: _________________


Call the doctor right away if any of the following occurs:


You’re unable to place the tube.

Your child has trouble breathing.

Redness, swelling, leakage, sores, or pus develops in the skin around the tube site.

You see blood around the tube, in child’s stool, or in contents of the stomach.

Your child coughs, chokes, or vomits while feeding.

Your child has a bloated or rigid abdomen (belly feels hard when gently pressed).

Your child has diarrhea or constipation.


Fever:

In an infant under 3 months old, a rectal temperature of 100.4°F (38.0°C) or higher

In a child 3 to 36 months, a rectal temperature of 102.0°F (39.0°C) or higher In a child of any age who repeatedly has a temperature of 104.0°F (40.0°C) or higher

A fever that lasts more than 24 hours in a c